
عدادات الطاقة BMR

الأجهزة المدعومة
| Device Type | Modbus TCP (Ethernet) | RS485 |
|---|---|---|
| PLA33 | ✅ | ✅ |
| PLA33RX |
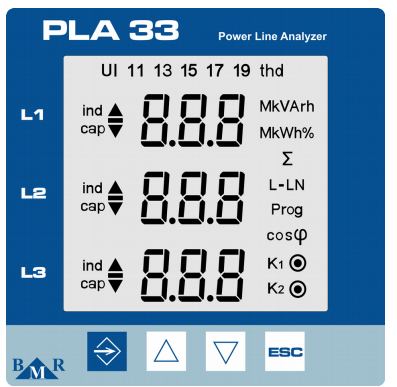
الشكل 1: اللوحة الأمامية لجهاز PLA33، وتظهر أزرارًا مثل SET ومفاتيح المؤشر وESC.
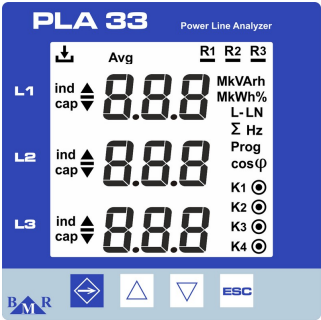
الشكل 2: اللوحة الأمامية لجهاز PLA33RX، وتظهر أزرارًا مثل ESC ومفاتيح المؤشر ومؤشرات LED للحالة الخاصة بالتسجيل ومخرجات المرحّل.
التوصيل
RS485
لتوصيل أسلاك RS485، اتبع إرشادات توصيل أسلاك RS485.
معلومات
RS485 Wiring
- For correct RS485 wiring: Follow the guidelines for RS485 wiring.
- If the wiring shown in the table below is incorrect, please let us know.
- There is no general consensus in the industry about the usage of A and B for the RS485 polarity, so it may be counterintuitive and opposite of what you might expect for some devices.
| Device | SmartgridOne Controller model OM1 | SmartgridOne Controller model IG8 | RS485-USB converter | RS485-Ethernet converter |
|---|---|---|---|---|
| A | RS485 A | RS485_POS | RS485 A | TX+ |
| B | RS485 B | RS485_NEG | RS485 B | TX- |
| GND | RS GND | GND | Not available | G |
تحذير
NOTE: RS485 Device Addresses
- You MUST give each device on the RS485 bus a unique address. Check the manual of the device on how to do this.
- Use lower addresses first (1, 2, ...) because the SmartgridOne Controller will find them faster!
- For each device, it is generally recommended to stick with the factory default baud rate, parity, and stop bits. The SmartgridOne Controller will scan on those first.
Ethernet
لتوصيل أسلاك Ethernet، اتبع إرشادات توصيل أسلاك Ethernet.
التكوين
تكوين RS485
لتكوين اتصال RS485 على عدادات الطاقة BMR، اتبع الخطوات التالية:
-
تعيين عنوان Modbus:
- ادخل إلى قائمة الإعدادات بالضغط على زر SET لمدة 5 ثوانٍ.
- انتقل إلى قائمة الاتصالات (
P_2) باستخدام مفاتيح المؤشر. - عيّن Id (عنوان Modbus الفريد) بين 1 و247.
-
تعيين معدل البود:
- في قائمة الاتصالات (
P_2)، اضبط bd (معدل البود) ليتوافق مع نظامك. تتضمن معدلات البود المدعومة9.6 / 19.2 / 38.4 / 57.6 / 115 kBd.
- في قائمة الاتصالات (
-
التكافؤ ووحدات بت التوقف:
- كوّن PAr (التكافؤ) على أنه
NoneأوOddأوEven. - عيّن St (بتات التوقف) إلى
1أو2حسب الحاجة.
- كوّن PAr (التكافؤ) على أنه
-
إنهاء RS485:
- إذا كان العداد هو الجهاز الأخير على ناقل RS485، فأضف مقاومة إنهاء بقيمة 120 Ω.
تحذير
NOTE: RS485 Device Addresses
- You MUST give each device on the RS485 bus a unique address. Check the manual of the device on how to do this.
- Use lower addresses first (1, 2, ...) because the SmartgridOne Controller will find them faster!
- For each device, it is generally recommended to stick with the factory default baud rate, parity, and stop bits. The SmartgridOne Controller will scan on those first.
تكوين Ethernet (PLA33RX فقط)
للأجهزة التي تتمتع بإمكانية Ethernet:
- تأكد من توصيل كابل Ethernet بشكل صحيح.
- استخدم برنامج مراقبة الطاقة (PMS) لتكوين عنوان IP وقناع الشبكة الفرعية والبوابة.
- تحقق من تعيين منفذ Modbus TCP على 502.
Last updated December 11, 2025Edit this page